Tag Archives: photography

Making the Transition from Amateur to Professional Photographer

Making the transition from amateur to professional photographer can be a challenging process, but with the right mindset and approach, it is definitely achievable. Here are some tips to help you make the transition:

1. Invest in High Quality Equipment

Professional-grade cameras and lenses can make a big difference in the quality of your photos. They are designed to deliver high-resolution images with accurate colors and sharpness. However, it’s important to note that expensive equipment alone won’t make you a professional photographer, but it will give you the tools to produce high-quality images.


High quality equipment can help create strong images with challenging subjects

If you can’t afford to purchase high quality equipment, consider renting for specific shoots. See here for potential benefits of renting equipment.

2. Learn the technical side of photography

Understanding things like aperture, shutter speed, and ISO can help you take more creative and well-exposed photos. It’s important to master the technical side of photography so you can focus on the creative side, and not get bogged down by technical issues. There are plenty of online resources and classes available to help you learn the technical side of photography.

3. Study the work of other photographers

Look at the work of other professionals and study their compositions, lighting techniques, and post-processing styles. This can give you inspiration and ideas for your own work, and help you learn new techniques. Be sure to study photographers in your desired niche or genre, as well as those who have a style that you admire.

4. Develop your own style

Try to find your own unique vision and style, and don’t be afraid to experiment with different techniques and subjects. Your style is what will set you apart from other photographers and make your work stand out. It takes time to develop your style, so don’t get discouraged if it takes a while to find your niche.

5. Build a portfolio

Put together a collection of your best work to showcase to potential clients or publishers. Your portfolio is a representation of your work and it’s important to make sure it’s professional and showcases your skills. Make sure your portfolio is up-to-date and highlight your best work.

Take time to build you portfolio and develop your own style

6. Network and market yourself

Connect with other photographers, attend photography events and workshops, and use social media and other online platforms to promote your work. Networking is key to building a successful career as a professional photographer. Attend photography events, join photography groups, and connect with other photographers online. This will give you the opportunity to learn from others and make connections that can lead to new opportunities.

7. Get Feedback

Ask other photographers and industry professionals for feedback on your work and be open to constructive criticism. Feedback can help you improve your work and make you a better photographer. Be open to constructive criticism and take it as an opportunity to learn and grow.

8. Get proper training

Consider taking classes or workshops to help you improve your skills and learn new techniques. There are many photography schools, classes, and workshops available to help you improve your skills and learn new techniques. This can be a great way to gain knowledge and experience, and help you make the transition from amateur to professional.

9. Learn the business side of photography

Understand the legal and business aspects of photography, such as contracts, invoicing, and taxes. Running a photography business is more than just taking pictures, it’s important to understand the legal and business side of things in order to run a successful business.

10. Be persistent

Building a career as a professional photographer takes time and effort, so be prepared to put in the work and be patient. Don’t get discouraged if things don’t happen overnight. Building a career as a professional photographer takes time, dedication, and persistence. Stay focused, work hard, and don’t give up.

Thanks for reading this post – Making the Transition from Amateur to Professional Photographer. Happy shooting.

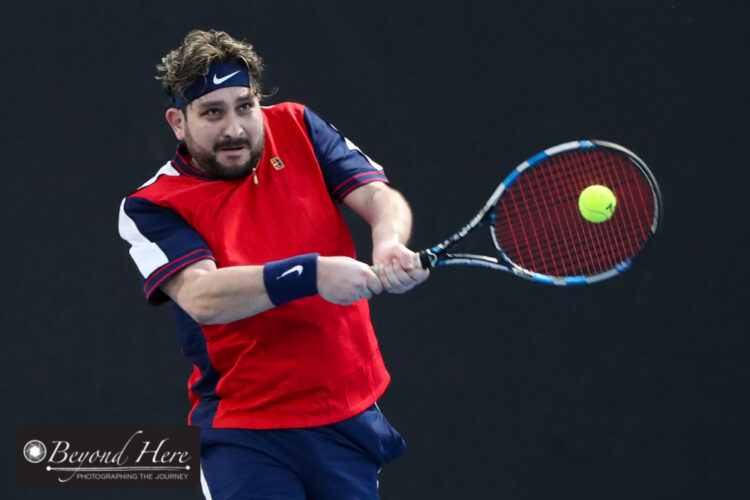
Tips for Photographing Tennis

Summer is a super time for shooting outdoor sports and capturing action. Lots of people are enjoying the warm weather, getting exercise, and enjoying social time. Here are some tips for photographing tennis.

Tip #1 – Making use of Different Light Conditions

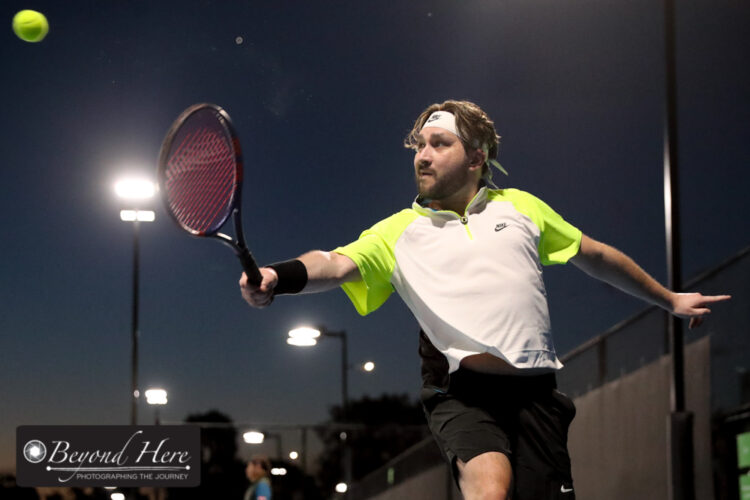
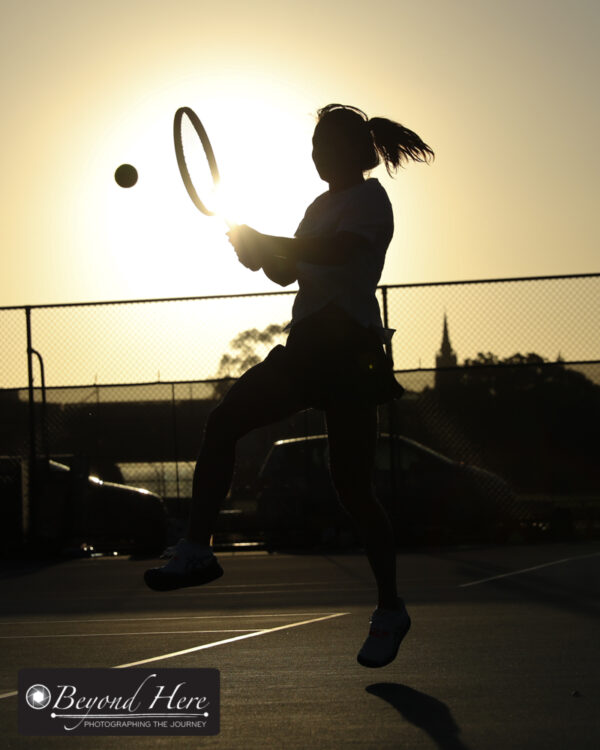
In this post I am including images shot in very different lighting conditions – day, evening / twilight, and night. All offer great opportunities to shoot different styles of images.

Daytime images will typically offer the brightest lighting conditions

Day time images will usually offer the brightest light and will make capturing fast action easier. Twilight images create opportunities for silhouettes and more unique images. And night shots will often give you the opportunity to have the well lit player stand out from the dark background. Explore all lighting conditions for variety in your images.

Tip #2 – Explore Different Shooting Angles

On a tennis court the action takes place in a defined space. If you’re not careful your images can begin to look the same. Try exploring different shooting angles to create variety and interest.

A low angle adds interest in this image

Tip 3 – The Ball Adds Interest

It is not a universal rule, but in general, images which include the ball are more interesting than those without. Don’t take this as a golden rule, but do observe your own images. That makes your timing important to be able to capture the ball in your images while it is close to the player.

Try including the ball in your image

Tip #4 – Use Fast Shutter Speeds

Capturing the split second action while the ball is close to the player requires good timing and equipment. It is something which definitely gets better with practice. Use fast shutter speeds to help you freeze the action. How fast? The image above is benefiting from shooting into the bright sun allowing a shutter speed of 1/8000s.

Tip #5 – Close Ups Can be Very Interesting

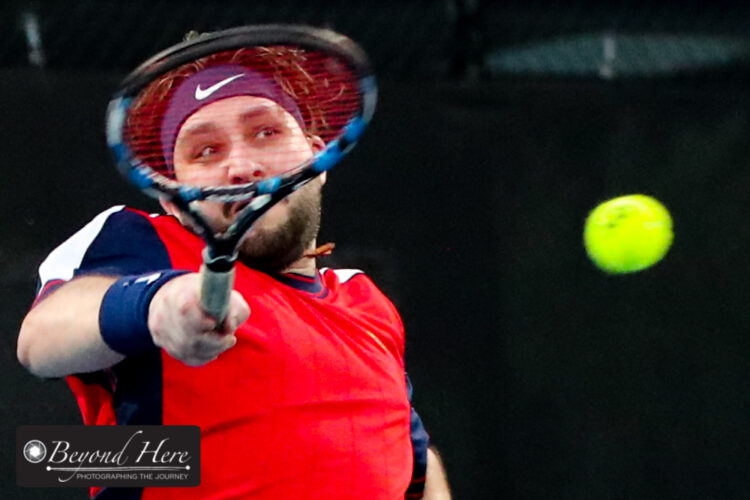
Try shooting very close up images of tennis players. I don’t mean to stand super close (!) but use a zoom lens to create an image which captures the player’s facial expression. Very close up images can be super interesting.

Tennis close up images can be very interesting

Thanks for reading these tips for photographing tennis. Happy shooting!

Five Lessons from Film Photography Days

I have come across several photographers and clients recently who can barely remember film and film cameras. I feel fortunate to have lived through both the film photography and the digital photography eras.Soon there will be a generation who only grew up with digital. Technology changes have brought changes to photography, and made me think about my top five lessons from film photography days.

Film camera

We are getting to a time when many young photographers have never used a film camera

In the days of film, photography was different. I bought my first SLR camera in 1997. At that time, you planned how much film you could afford and could carry. The rolls came mainly as 36 exposure or 24 exposure. You were careful with how you used each exposure as you had a limited number and each one cost you money, both to buy the film and to have it processed. When you got your film processed it could be days, weeks, or months after you made the image. Wow, times have changed! Today, memory cards are cheap and have almost unlimited capacity. Images can be viewed on the back of the camera immediately. Often, images don’t ever get printed, they exist only in digital form. So, looking back on what I’ve learned, what are my top five lessons from film photography days?

(1) Consider Composition

In the film photography days, you had to carefully consider each image before you took it. With a limited amount of film, you had to make sure it lasted. With today’s cheap memory cards there is almost no limit on the quantity of images you can make. Sometimes this leads to an approach of shooting everything – summed up in that great description to “spray and pray”. Unfortunately this can lead to a large number of poor quality images. Lesson 1 – take the time to consider composition. It will improve your photography, and save you time reviewing and processing lots of poor quality images.

(2) Learn Faster

You had to wait for processing in the film era. This made it difficult to learn, as sometimes I could hardly remember actually taking the shot! Being able to review images instantly in the digital age gives us a great opportunity to learn faster. To make the most of this opporunity to learn faster, take the time after each shoot to review the images you have made and consider how you could improve them next time. Do this on your computer away from the shoot.

(3) Avoid Constantly “Chimping”

Chimping is that annoying habit of constantly reviewing your images on the back of your camera. In the film photography days, this option didn’t exist. Ironically, this helped the photographer engage with the subject and remain focused on creating great images. In effect, it kept you in the “creating zone” and didn’t allow you to drift into “reviewing mode”. If you are a photographer who checks the LCD screen after every image – think about not looking at it for a while, and staying engaged with the subject you are shooting.

(4) Get it Right In-Camera

Film

Film and film canisters used to be in every photographers bag. Now very few carry film.

Digital technology and the post production tools we have now give us great flexibility to adjust images after they have been made. Unfortunately this also leads some people to believe that the quality of the image coming directly out of the camera is less important now as they “can fix it in photoshop”. I hope you cringed as you read that. A bad image will still be a bad image after post production. A really good image straight from the camera, can remain a good image, or be enhanced further in post production. Don’t get lazy and expect your camera and post production tools to do everything for you. Learn your craft. Get it right in-camera and use post production tools to enhance, not fix, your images.

(5) Print Your Best Work

In film photography days, there were only prints or slides. Now it is very common for images to exist only in digital form. They can be shot on a digital camera, digitally enhanced in post production, and be used only on websites. If you have ever seen good quality images in print you will know how powerful prints can be. Think of family portraits in a home, wedding images hanging on walls for generations, and landscape images in corporate boardrooms. Take the time to print your best work. It will have an impact.

These are my top five lessons from film photography days. I don’t miss those days, but I feel lucky to have used film and digital technology. Did you live through the film photography era? What lessons did it teach you? Do you miss any aspects of that era?

Make the Most of Your Flash

Have you heard that your flash photography will improve dramatically if you use your flash off the camera? Believe me – it will. In this post I outline how to make the most of your flash by using it off camera.

So, how do we use the flash off the camera? In an earlier post I explained How To Use Flash Triggers (thanks to the readers who emailed me with positive feedback about that post). Flash triggers enable us to fire the flash when it is off the camera. With 3 other simple pieces of equipment you will be able to create images with soft, directional flash light. When you master this, you will really make the most of your flash!

Adapter

Attach the adapter to the top of the light stand

What equipment do I need? In addition to the radio triggers you will need:

  • a light stand
  • an adapter
  • a shoot through umbrella

First, you will need a light stand. This enables you to position the light at whatever height and distance from the subject you like. Second, you will need an adapter. This is the small piece of equipment which attaches to the top of your light stand. It allows the flash to sit on top of it. It also has a hole through it for the umbrella to fit in. Thirdly, you will need something to spread and soften the light. You can use a reflective umbrella or a shoot through umbrella. My preference is the shoot through umbrella as I find it enables better control of the light.

Flash

Attach the flash unit to the top of the adapter

How do I set it up?

(1) attach one of your flash triggers to the camera, and one to the flash
(2) set up your light stand
(3) attach the adapter to the connection point on top of the light stand
(4) attach the flash (with trigger attached) to the adapter
(5) thread the umbrella through the hole in the adapter

Now that you have this set up, you can position the light relative to the subject. If you don’t like how your subject is lit, move the light or adjust the power from the flash. Now, instead of being stuck with the flash on the camera, you can use your flash anywhere! This is how to make the most of your flash! (This is a one light setup, for additional light sources replicate the process for multiple lights).

What does it cost? This is a hard question to answer and depends where you live and where you like to shop! I live in Australia and buy most of my equipment at an online store. At that store there is currently a special offer which includes 2 radio triggers, a reflective umbrella, a light stand and an adapter, for A$140.

Off camera flash

The final set up

What next? To build on this lighting set up you can add a portable background. Once you have a background, you effectively have a simple, portable studio. I use this set up when doing corporate portraits in an office environment.

If you have questions about this set up, please feel free to add a comment to this post, or email me at craig@beyondhere.com.au

I hope this post has been useful and will encourage you to take the flash off the camera and make the most of your flash!

Better Backgrounds for Better Images

Better backgrounds

A clean background has added impact to the subject

This photo was selected as the file of the day on one of the wildlife photography communities I participate in on Google+. It is a female superb fairy wren. I took this shot yesterday afternoon in Melbourne, Australia. It has prompted me to write about what is the single biggest way to improve your photography – better backgrounds for better images.

This tip is applicable to nearly every type of photography – and on this post I have included sample images from weddings, wildlife, sports, and family portraits.

In all these types of photography, having a nice clean background has focused attention on the subject. There is nothing distracting or off putting, and the subject really stands out in the frame. So, let’s see some sample images, and discuss how to use better backgrounds for better images.

Better backgrounds

A clean, bright background focuses attention on the subject

This example is from a family portrait shoot. In any type of photography where you are setting up the shot, getting nice clean backgrounds is straight forward but requires the photographer to choose the type of background suitable to the shot. In this case, I was doing an outdoor family portrait session at a park. The child was wearing dark colors so I looked for a plain background which also had lighter colors. In this case, the background is a stone wall which formed part of a monument. It is a nice bright color which offsets the subject’s dark shirt, and provides a clean but textured background. At a park environment, also look for trees or nature scenes which would give clean backgrounds, or fences or building walls. These can all be effective.

Better backgrounds

An outdoor stairwell as a background for a wedding image

Ok, now for a wedding image. This image was taken at an inner city wedding. As you can see I have used an outdoor stair well as the background for this image. Weddings are particularly important to get clean backgrounds, as the focus needs to be on the couple, their relationship and the wedding day.

Again, with weddings you have time to plan these images in advance, and as long as the weather cooperates, it is a matter of following your plan. In this image the lack of color in the stairs also helps to focus attention on the bride and groom. (Interestingly, this image had more impact because of the colors than a similar black and white image.)

Even in inner city, busy environments with lots of people, it is possible to find clean backgrounds to support your images. Look for stairwells, doorways, arches, or architectural features – like walls. Better backgrounds for better images works for wedding photography too.

Freezing motion

Freezing motion in indoor lighting conditions will require higher ISO

The use of plain backgrounds in sports can be effective, but there are also times when a busy background works well in sports photography.

If you think about a basketball image, there is a time to have the player on there own, and also a time for the player to be seen against a background of a cheering crowd.

In sports photography, it is still possible to get clean backgrounds, but it also might be more effective to get a busy background of a cheering group of supporters.

Ok, so how do we put the lesson of better backgrounds for better images into action? To improve your photography with this technique it is a matter of consciously choosing what you would like for your background and then practicing. After a short period of time you will be subconsciously positioning yourself and your subject to achieve backgrounds which help your subjects stand out.

If you have found this post – better backgrounds for better images – useful, you may also like posts on:

Thanks for reading this post. Good luck with better backgrounds for better images.


Getting Started in Your Photography Business

Today I swapped Facebook messages with a very enthusiastic photographer who has visions of a career change and making a living from travel photography. Her enthusiasm coupled with a healthy dose of “where to next doubts” reminded me of myself when I was starting out in 2008. It prompted this post – getting started in your photography business.

Financial Planning

Plan for your financial success.

Lots of people dream of turning their hobby into their source of income. It is all about “living the dream” and reminds us that “if you do what you love, you’ll never work a day in your life”. Cool! But getting started in an industry you may have very little experience in is a daunting challenge. So, I’ve thought about what I’ve learned over the last 6 years. Here are 7 tips if you are planning on getting started in your photography business.

Tip 1 – Capitalize on Your Enthusiasm

The early stages of starting a business are very exciting, you are full of enthusiasm and enjoying the new challenge. Capitalize on your enthusiasm! Act on it, get started, do something.

There is a hugely empowering feeling that comes with taking action – get started, and get started now! Organise a website, join a stock photography website, shoot a pile of new images, write an advertisement for yourself, find an online community to join. Whatever it is, act today. Get started.

Tip 2 – Expect Mistakes

As you start in an industry you don’t know, you are not going to get every step right first time. Expect mistakes, they are part of the learning. When they come, welcome them. This is how we move forward. I started out with a horrible website and expected that to get lots of visitors, and then get lots of clients. That’s not how it works. The mistake and the lesson are both ok. Learn the lesson and move forward.

Tip 3 – Ask for Advice

If you want to reach your goals slowly – do it your own way, don’t ask for input, and refuse to take advice. If you want to reach your goals more quickly – ask for advice from people who’ve trodden this path before you! As a photographer, ask for advice both on your images and how to market your images.

The bad news is that making images and marketing images are entirely different skills. The good news is that the photography industry is full of people who will share their experience and help you. All you have to do is ask.

E business

Today there are a wide variety of ebusiness opportunities

Tip 4 – Be Prepared to Learn

Asking for advice is the first step. Being prepared to learn is the next. Running a successful photography business is both a journey of self discovery and a process of continuous improvement. Whether its learning a new lighting technique, understanding how e business works, learning about stock photography, getting better ways to pose your subject, or knowing how to improve your post production workflow – be prepared to learn. Keep improving. Then improve again. And again. And again.

Education

Research your target market

Tip 5 – Research the Market

Right when you start you are full of energy but without direction. This is a great time to study the market.

If you are a travel photographer, what are successful travel photographers shooting? What style of images are popular? How are they lit? Why do they work? If you are a stock photographer – what are the current trends in stock photography? What are the next emerging markets? What is the under served niche you can target? If you are a wedding photographer, how are the best wedding photographers in your area marketing themselves? What style of images are they shooting? Why does it work? Is there an opportunity for you?

Use some of your new starter energy to see what the market is doing.

Tip 6 – Plan your Finances

Starting a business means generating an income – and having an income higher than your expenses as soon as possible! It is very easy to get carried away with the romantic notion of being a photographer, and not bother to look at your income and expenses. When you are starting out, you are setting the principles you will run your business on forever. You need to look at both expenses and income and assess how well the business is going. Happy clients is one thing, a happy accountant is another. Keep it real.

Tip 7 – Keep Going!!

You will run into road blocks, you will get discouraged, you will have doubts. When you get to the point of being about to give up – this is the time to keep going! If this were easy, everyone would do it. There is something special in overcoming difficulty to arrive at success. The journey makes you better – keep going!

There are hundreds of other lessons learnt in starting a photography business. Please leave a comment on this post if you have an issue you’d like me to address, a question you’d like answered, or just some encouragement!

Finally, the lady I swapped messages with today has already found a community of photographers, she is asking questions, and listening to the answers. If she can keep that up, and keep going when she has doubts, she will do very well.


Freezing Motion

Freezing motion is a photographic technique to capture what the human eye cannot see. It is particularly effective in wildlife and sports photography. So what do we need to do to freeze motion, and how can we use this?

To be effective in freezing motion we need to use a fast shutter speed. To achieve this we may need to use a high ISO depending on the lighting conditions. How fast does the shutter speed need to be? That depends on how quickly the subject is moving. Let’s look at some examples of freezing motion.

Freezing motion

Freezing motion in indoor lighting conditions will require higher ISO

Indoor sporting settings are particularly challenging for freezing motion. The low levels of lighting will mean higher ISO settings are required to get fast shutter speeds. In this image the settings are ISO4000, 1/500s, f2.8

In this case the player has just set off from a standing start. For this shot 1/500s has been fast enough to freeze the action. If he was running full speed we would need a shutter speed of 1/1000s or faster to freeze the motion.

Black swan

Freezing motion is very effective in wildlife photography

Example two is a black swan. This image was taken at Albert Park Lake in Melbourne, Australia. The outdoor setting and brighter lighting means we can use lower ISO, though we still need fast shutter speeds to freeze the action. In this case the settings were ISO100, 1/1600s, f2.8.

The bright sunny conditions means I have been able to use ISO100 and 1/1600s to freeze the action. Smaller, faster wildlife will require fast shutter speeds than these. To achieve focus, I have selected a single focus point and focused on the swan’s head. In the sports examples, I have used the same technique. Choose a single focus point and focus on the player’s head.

Freezing motion

Freezing motion in sport is straightforward in well lit conditions

In example three we have a player running towards first base. The brightly lit outdoor conditions mean we can achieve fast shutter speeds with lower ISO’s. In this case the ISO is 200 and the settings 1/1000s and f4.5. Again, for faster moving subjects, higher shutter speeds will be required.

How might we use the techniques for freezing motion? The sports examples show you that action images are no longer reserved only for professional sports people. With today’s camera technology and these techniques it is possible to create action portraits in local, amateur sports too.

In example four, we have a cassowary. These very large, impressive, flightless birds are difficult to photograph. Being ready with the techniques outlined in this post, meant that when this cassowary moved its head in an unusual way, I was ready to capture a unique portrait. In this case the settings were ISO500, 1/200s, f2.8. The slower shutter speed was effective here because these large birds move relatively slowly (except when they are running!!)

Cassowary

Be ready with a fast shutter speed, and a single focus point

For success in freezing motion, keep your shutter speeds high, and use a single focus point. 1/500s will work successfully for larger, slower moving subjects – and 1/1600s and faster for smaller faster moving subjects.


Featured Photographer Alan Hinchliffe

Today’s featured photographer is Alan Hinchliffe. Alan is a nature and wildlife photographer from South Yorkshire, England. He is half of a two person photography team, known as Jackal Photography. Together they shoot a wide range of nature and wildlife images. Jackal Photography’s work can be seen on their website at Jackal Photography. Alan has had his images published in several magazines, one currently on show in the Leeds Natural History Museum, and an image in the 2015 RSPB calendar which is due out on 11 July 2014. (Editors note – RSPB is the Royal Society for Protection of Birds)

Robin

Robin taken from the garden shed. Copyright Alan Hinchliffe

Alan, tell us more about Jackal Photography …

I set up jackalphotography 2 years ago. It is a combination of me, Alan Hinchliffe, and my other half, Jacqueline Bamber. We have both been into photography for 6 to 7 years. The website was really something I wanted to try my hand at, and to show some of our favorite nature and animal captures.

What are your favorite places to photograph wildlife in the UK?

We are pretty lucky because our favorite places are wildlife parks and nature reserves, and we have some great ones local to us. The Yorkshire Wildlife Park is pretty new and its an amazing place, huge enclosures, a great selection of animals and camera friendly – not too many mesh fences.

Lioness

Lioness at The Yorkshire Wildlife Park. Copyright Alan Hinchliffe

RSPB Old Moor is about 5 minutes drive and it has several hides. The garden hide is set up with perches and has a corner for photographers to sit. It also has some great wildlife, flowers, and bugs for practicing your macro shots.

When you go to a wildlife park what gear is in your bag?

In my bag is a Canon 7D which is ideal for my wildlife needs with its high burst rate and great auto focus with the Canon 100-400mm lens. It is a sharp and versatile lens and is almost always attached to my camera. I also carry a recently purchased Sigma 105mm macro lens, spare batteries, memory cards, cleaning cloths, and that’s it!

It is now mid summer in the UK, what photo shoots do you have planned for this time of year?

For the next few months I will be getting out to do some macro work. At this time of year its great for bugs and wild flowers. I will also take a trip to the coast to RSPB Bempton Cliffs to see the nesting seabirds – the thousands of gulls and gannets they get there each year is quite a sight!

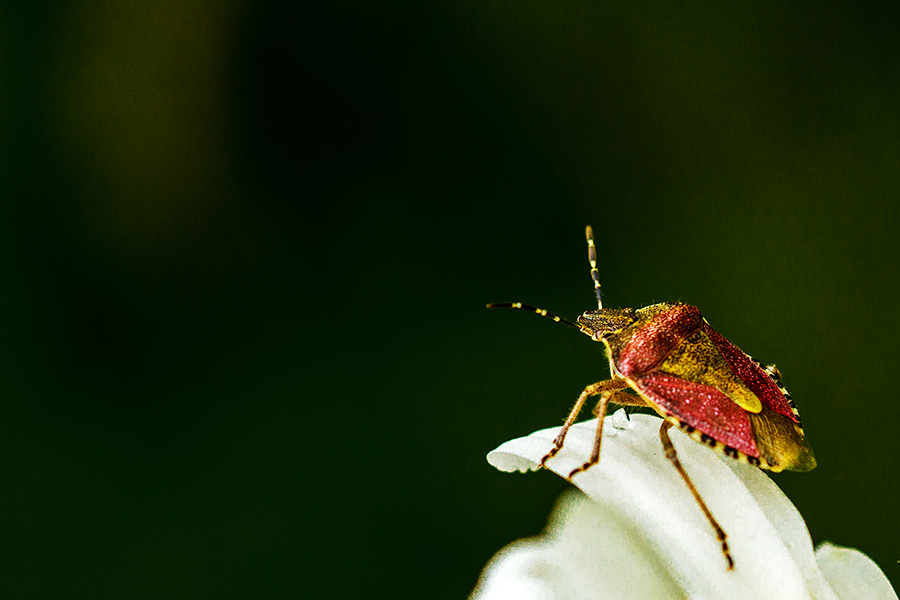
Shield Bug

Shield Bug at RSPB Old Moor. Copyright Alan Hinchliffe

What are your top 3 tips for nature and wildlife photography enthusiasts in the UK summer?

Usually I would say – take an umbrella! – but its been a pretty good summer so far. Seriously though, macro is the way to go in the UK summer. So visit a nature reserve or get out in the garden or countryside and start looking for some bugs to shoot.

Gannets

Gannets at RSPB Bempton Cliffs. Copyright Jacqueline Bamber

Also places well known for seabird colonies like Bempton Cliffs, or Farne Islands for the puffins and gannets. Gannets make for great ‘bird in flight’ practice, as they are huge and just glide through the air. Take plenty of batteries and memory cards as your finger will never leave the shutter button at these places. Evening light suits me best – the sunrise is far too early in the summer for me!

Alan’s work in nature and wildlife photography has been recognized by being published in several magazines including Digital Photographer. UK residents can buy prints directly from Jackal Photography’s website and photographers worldwide can connect and follow his work via Google+.

Thank you for being Beyond Here’s featured photographer Alan Hinchliffe.

Newborn Photography Some Easy but Essential Tips

Newborn Photography some easy but essential tips is a guest post from Renate Hechter. Renate is the owner and operator of Pure Dynamics Photography in Sydney, Australia. You can find out more about Renate and Pure Dynamics Photography on the Beyond Here contributors page.

Newborn

Keep your newborn warm and well fed. Copyright Renate Hechter

Newborn photography some easy, but essential tips.

Thank you Craig for the opportunity to write a guest post on Beyond Here.  I am a family photographer, but love newborn photography best of all. It is such a privilege to be able to capture those early moments in the first few weeks of a baby’s life. It will be a keep-safe for the family and the baby in years to come.

When I tell people I do newborn photography, I often hear them gasp, “Wow – how long did it take to get that shot, must have been hours? You must be some sort of baby whisperer!”.

Of course I’m not! It may have helped that I have 4 small children and therefore have had to deal with 4 newborns at some point.

Rather like dealing with your own family, newborn photography is all about planning and preparation. Here are some easy, but essential tips that you can follow if you want to capture the first few weeks of a precious little one’s life.

  1. Make sure baby is safe

Safety, safety SAFETY!! You will need a baby spotter and mum usually works best.  They need to be clearly briefed as to their responsibility – they are to watch their baby and preferably keep a hand on baby at all times before the shot – looking out for hazards such as rolling off the baby posing beanbag.

  1. Newborn

    Take your time with newborn photography. Copyright Renate Hechter

    Make sure baby is fed

Really stress to the parents that baby is fed and burped before arriving and is coming to see you in their normal sleep time. You may want to get the family to arrive slightly early for their session, so mum have the opportunity to give baby a quick feed again, if necessary.

  1. Make sure baby is warm

Make sure where you take you photographs are toasty warm so the baby does not get cold – especially if you are taking pictures of naked or semi-clad babies. Turn the heating up to around 25 degrees C or use a directional heater. If using a directional heater, make sure you keep it far enough away from the baby’s sensitive skin.

The next few tips involve four S’s for helping to settle a newborn into a pose;

  1. Swaddling

Invest in a number of stretchy baby wraps.  They can be used successfully for babies who struggle to be settled straight away. Shoot your swaddling poses first if that’s the case.

  1. Shushing (or white noise) 

There are a number of smartphone and computer apps that you can download for white noise – turn up the volume – that is very effective for baby, and I find that it also relaxes the adults.  Relaxed parents mean a relaxed baby.

  1. Sucking

Have a dummy/soother ready and make sure you communicate this with the parents beforehand.  Some parents have dummy fear, but using a dummy to settle baby in the pose and then taking it out just before you take the shot works well.

Baby suckling

Use a dummy or soother to calm baby. Copyright Renate Hechter

7. Sidelying or stomach position

Almost miraculously, a lot of baby poses are in tummy or side-lying position.  Babies do love those positions and will often settle and fall asleep.  Keep a firm hand on baby in those positions, as that will aid them falling asleep.

8. Take your time

Add a good dose of patience into the mix. The newborn should be fast asleep when you attempt your poses, and that may not happen immediately.

9. Keep mum calm

Explain the process to the mum.  A calm and relaxed mum often means a calm baby.

Newborn

Newborns allow you to position them. Copyright Renate Hechter

10. The younger, the better

The best time to photograph newborn are between day 5 and 20.  During this time period, they tend to sleep a lot (especially if they are fed well). Your can also get them into those wonderfully squishy positions.

And last, but not least – Safety again!

So important, it’s worth mentioning twice.

Do not forget to enjoy your session!

Making Unique Portraits

In this post we look at an example of making unique portraits without spending hours in post production.

For this stock photography shoot, the model had very long red hair. We decided to make a feature of her long hair, to make an interesting and unique series of images.

Unique portrait

A unique portrait created using fishing line and parental support

How did we set about making these unique portraits? For the first portrait, we took her plaited hair and attached several pieces of fishing line at different intervals along the length of her hair. Her parents stood on each side of her, holding the fishing line. Then it was a matter of raising or lowering the different sections to achieve the wavy pattern. The total time to shoot this image was about 15 minutes. That consisted of preparing the fishing line, attaching it, and then taking a series of images to get the right look. What about post production? There were small parts of the fishing line visible in her hair and against the white background. These took about 5 minutes to remove in post production. There you have it, making unique portraits version one.

For the second image, the idea was similar, but the execution was different.

Unique studio portrait

Unique portrait created using a coat hangar threaded through her hair

In this case, we unwound a wire coat hanger, and threaded it through the models hair. This time, her hair was in a single plait. This made it possible to create more solid shapes out of her hair – in this case a large question mark. Once the shape was formed in the hair, again a parent held the coat hanger – which protruded from her hair. This one took longer to make. The coat hangar had to be threaded through the models hair, then shaped appropriately, and then the images taken. This took approximately 30 minutes and I was grateful for a very patient model. Again, about 5 minutes was required in post production to remove the coat hanger and parents hand which were visible in the corner of the shot.

There you go,  making unique portraits without spending hours in post production.

If you have found this interesting, you may be interested in these related posts:

Do you have a story to share about creating unique portraits? Please add a comment to this post.